Monday, September 30, 2013

Painting giant wings, Reaper KS Urban Legend Sophie WIP (NSFW)

This is the first time I painted a pair of wings, not this big at least.  But I figured that it should look something like leather, and should be a bit dry having been driving across the desert.  So I again air brushed the shadows and highlights with dark grey and white, and then thin painted on deep brown and light-grey-brown on them.

The highlight was done with white pigments mixed with thin light grey-brown paint, the recesses were painted with nato black mixed brown.  One thing I learned is that the Nato Black really would eat away some of the paint if it is painted on the edge of the painted area.  more about this later.

These are the photos of  the wings being mostly done.

Then on I had to do the claws at the tips of the wings.  At this close up shots the pigments are really showing up.  After these shows I thin painted some more mid tone to smooth out the transitions.

Although the claws were hastily done I like how they turned out, it was just GW Bone paint with GW brown wash at the edges.

So finally... I put the wings on her back.  See that little shiny bits on the right? that was the bit that was stuck to the holder and it wasn't painted on.  I put on the dark brown mix but forgot that it has some Nato black mixed in, so when I did that, it eats away the edge of the painted area.  I got that fixed later on.

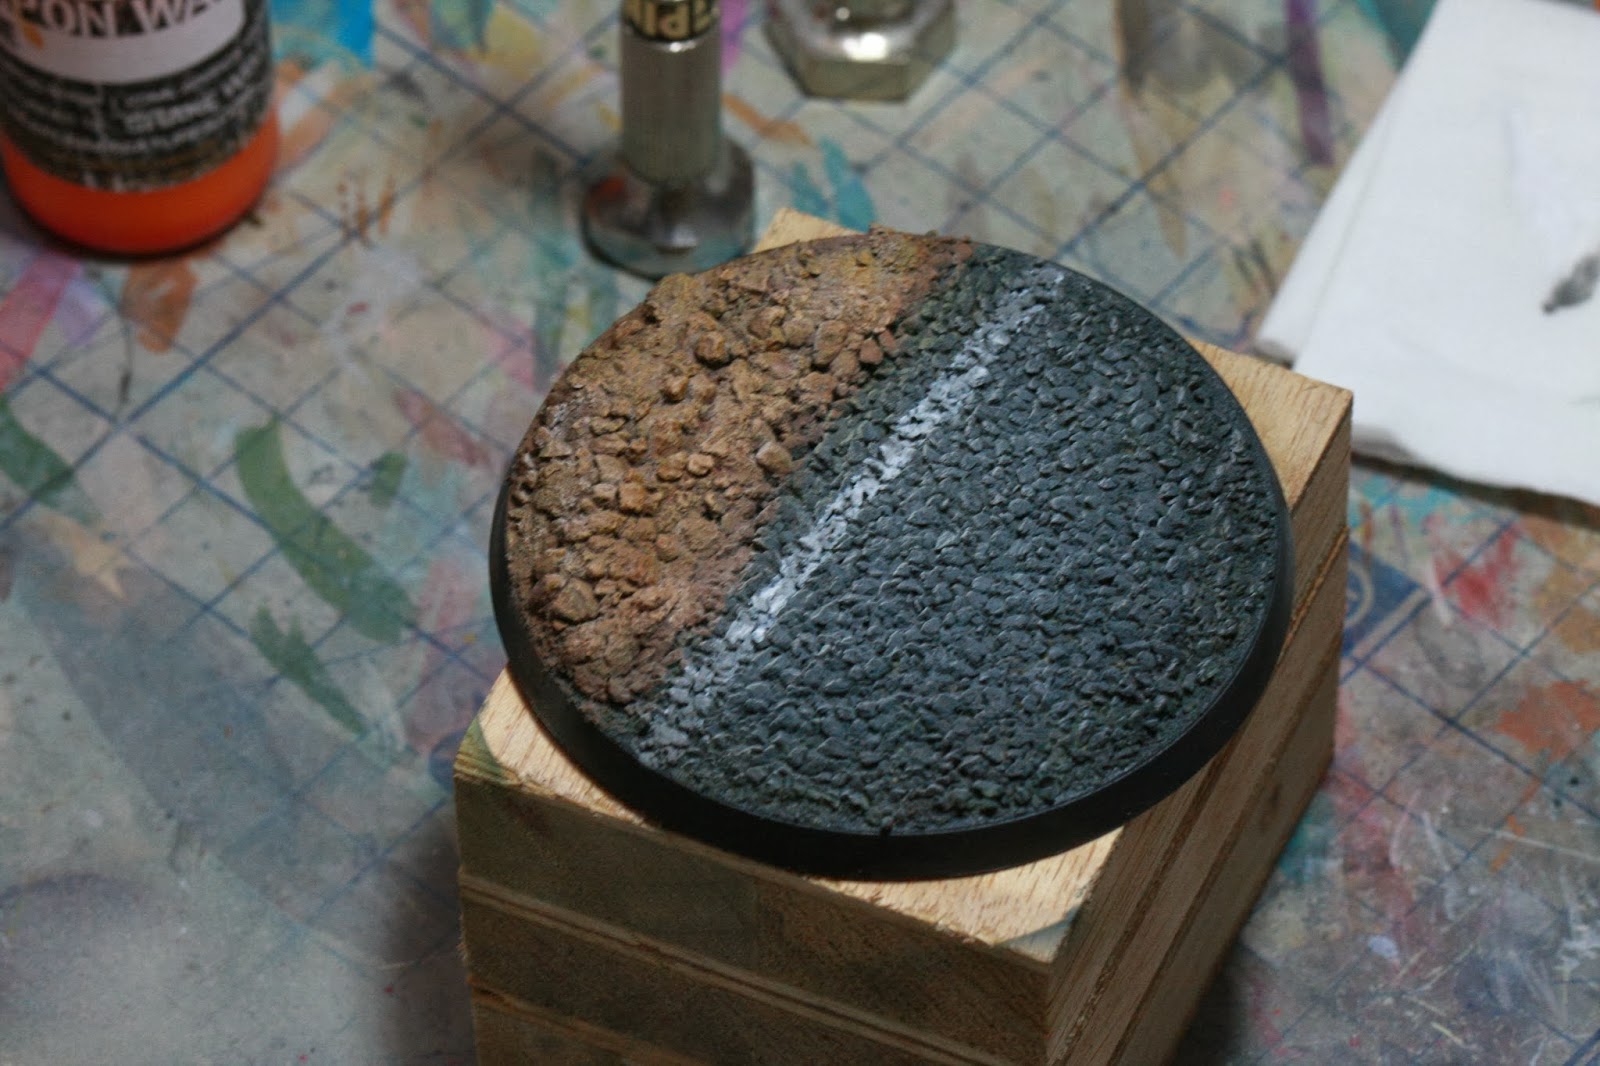
I'd say the base is a good choice, now that I can see her with all pieces attached.

Painting line of highlway, Reaper KS Urban Legend Sophie WIP

Thanks to a guy on the Reaper Forum, I got the idea of putting a white line on the base, because most of the roads got that.  I did some research on what highways in the desert suppose to look like, or how would one expect it to look like, so I can make it looks more convincing, and yep, I need markings.  But for the size of the base I guess I can only add a white line to the right of the bike, ie between the pavement and the off road area.... but that it might make the right side too 'busy' with too much visual elements.... And this is how it turns out.


Not too far from the actual road across the desert I'd say.


This is something of a first for me so I don't really know how to get the shading right.  Putting in a white line is easy enough though: I used white weathering pigments mixed with water.  I had sprayed on some varnish on the based before hand so it now got a nice 'bumpy' service for the pigments to hold on to.


The part near the edge needs a bit of work though, I guess I'd do some photoshoping to get an idea of how it should look like, as in how the line near the edge got darker to show the 'spot light effect' in the middle.


As shown here her bike is slight off the the line, ie, off the road a little bit.  That was actually half of an accident as I haven't thought of this until I got the sands in place.  What I should have done is to do a mock up like I did for Kathy so that everything are in the right place before getting this far.  Oh well, lesson learned.

[[[ SHE IS DONE: http://51-cent.blogspot.hk/2013/10/Sophie-done.html ]]]

Thursday, September 26, 2013

Painting with very thin paint

One technique I had learned over the years is to paint with thin paint, very very thin paint.  Some call it glazing, by applying layer and layer of thin paints to an area the thickness of paint could be much easily controlled.

My recent favorite is the Formula P3 mixing medium.  But first, let's see what do I mean by 'thin'

The paint we use is GW Scab Red Paint

This what the paint looks like straight out of the paint pot

Even after getting rid of the excess paint on the brush by brushing it off the edge of the palette, the paint is still pretty thick.  I measure the thickness by brushing it on the board, see if the markings would shown through. As shown here the lines kind of show up through the paint, but only barely.

So what I used to do is to use water to thin the paint, that's what a lot of people do actually, but I was never really good at doing that.  The problem with water is the paint seems to go the the edges of the area I painted.  So here you can see that although the blue lines are showing through the paints are not so even.

One trick I learned is to remove excess paint on a piece of dry tissue.  but as show here the water thinned paint actually spread out pretty widely and therefore 'pulled' the paint to the edges.

And sure enough the same 'edging' effect happened even if I carry less paint on the brush.

This is what the mixing medium looks like, it looks a bit like white glue.  Here I had already added thinned the medium with 50% water, mostly to prevent it from drying and to make it easier to manage.

See this is how good the medium is, it doesn't spread out like water thinned paint, and no more edging.

See how thin it is? the paint becomes more like a glaze or a tint to the board.


Painting nude human figure, Reaper KS Urban Legend Sophie WIP (NSFW)

Yes I could have just air brush the whole body with skin tone, I forgot.

One of the reasons why I turned down that idea is because I don't have the right color for it, I got a very pale flesh paint as the highlight but I don't have the right color to do the shading,  that was way I stick to using dark grey and white to do this.  My other worry is that if I did use the flesh paint I can't match it with my brush on paint.  Then again, no one would have notice the difference.

Here's a very honest shot of her, the hair isn't that nicely done but it was meant only as a base coat.
The one 'artistic decision' I made is with her eye.  Her left eye really isn't that nicely done, if I were to paint it as an opened eye it would look very, very odd.  That was why I decided to paint it as closed.  I could have gave her some eye shadow according to her concept art, she doesn't wear make-up.

Yes, the nipples.  Painted for four years and it's the first time I painted nipples.  Being a guy girl's nipples are naturally my prime concern: the color has to be right.  They have to be cute, they have to arose men, they have to look like little cherry sitting on top of a milky pudding... O_o... hope no one actually read this bit but I love writing it though, haha.
Pretty proud of the shading and the highlight of the rest of the boobs, I had done a lot of boobs by now and I got the hang of it.

Same thing with her bottom. Actually I did painted her private area as well but I don't think anyone would see it.  And in fact, it's just a line down the middle painted with wash, and a few more lines down the side and thinner wash to give it a bit of color.


Wednesday, September 25, 2013

Painting red, Reaper KS Urban Legend Sophie WIP

I love painting red, I guess that had something to do with being Chinese.  To us red means good fortune, we use a lot of red in celebratory events such as wedding and new years.  I guess painting has a lot to do with what we see in our daily life and that affect what we try to re-create by painting.

Tonight it's all about painting red on.  I had to paint the 'bone' on the back fenders first so that I can get to the gaps between the bones and the fenders better.  One thing that I learned while painting is that sometimes it's better to do the little bits first before painting the larger area that the bit is based on.


As shown the air-brushing really pays off now, I am using very thin paint and the light/dark base coat can help with setting the lightness/darkness of the paint I put on. The bone part was done with GW Bleached Bone as the base coat, followed by Repear's Khaki Shadow (09121) and GW Black Wash, and highlighted with very thin Repear's Khaki Highlight (09123).


Very happy with how the air-brushed base shown through with my very thin paint.  So the next part is to push the highlight even close to white, I'd very likely be using my air-brush again, but we'd see. Had a bit of thought about the wings there when painting the gas tank, I guess gold is the default color as it would look good on  red, but I am thinking bone color or brown might work too... but I guess the wing has to kind of match the style of her boots, which got wing like ornaments  on them.


The boots aren't as well done as I would have expected.  The contrast on the boot isn't too good to start with and I made a mess when applying blue wash to the shades (I put too much).  So I guess in the next round I'd need to put on more red to the shading area.


[[[ SHE IS DONE: http://51-cent.blogspot.hk/2013/10/Sophie-done.html ]]]

Tuesday, September 24, 2013

Basing and painting metallic, Reaper KS Urban Legend Sophie WIP

Basing is not something new to me but there's always something new to learn every time I did it.  One lesson I learn and forgot and need to relearn is: if I am going to use sand, it pays to color the sand by soaking them in paint first.  Even with air brushing getting into the cracks are hard.

Anyhow we tried out two different bases look.  because her overall shape is triangular so a smaller circular base would work better.  Although the small rectangle base would work too, but because we want to add some diorama elements to the base we opt for the circular one for its size.


One of my favorite basing material is the pumice.  It tries pretty quickly and once it tries it felt a bit like rubber, easy to trim or rub off.  It's like a paste with sand so it gives a bit of texture too.

So after smoothing it out I put some white glue and water on the surface, then I sprinkle on the sand grains.  They are suppose to be tar so the top bit should have been flat. Oh well.

The other side is suppose to be off-road area so I mixed the pumice with bigger sand grains.  It took a while of pressing them together.  Re-creating the randomness of nature is so hard.  Notice the little hand axe there :)?


It was air brushed with dark green and nato black.  The idea is that the off road area will have some grass or plants around so the rocks would have a bit of moss on them.  The tar road looks okay, although I'd make it more grey down the track.

I then applied pigments on the off road area, loving how it turns out: it looks convincing enough.

Because I had only painted the metal parts and without another other color the painted parts are not so obvious.  I guess I made it a bit too 'worn-out' or 'dirty'.  Perhaps I should take a better photo of it...  Anyway looking at it in real it looks convincing.


[[[ SHE IS DONE: http://51-cent.blogspot.hk/2013/10/Sophie-done.html ]]]
Related Posts Plugin for WordPress, Blogger...