Tuesday, September 24, 2013

Basing and painting metallic, Reaper KS Urban Legend Sophie WIP

Basing is not something new to me but there's always something new to learn every time I did it.  One lesson I learn and forgot and need to relearn is: if I am going to use sand, it pays to color the sand by soaking them in paint first.  Even with air brushing getting into the cracks are hard.

Anyhow we tried out two different bases look.  because her overall shape is triangular so a smaller circular base would work better.  Although the small rectangle base would work too, but because we want to add some diorama elements to the base we opt for the circular one for its size.


One of my favorite basing material is the pumice.  It tries pretty quickly and once it tries it felt a bit like rubber, easy to trim or rub off.  It's like a paste with sand so it gives a bit of texture too.

So after smoothing it out I put some white glue and water on the surface, then I sprinkle on the sand grains.  They are suppose to be tar so the top bit should have been flat. Oh well.

The other side is suppose to be off-road area so I mixed the pumice with bigger sand grains.  It took a while of pressing them together.  Re-creating the randomness of nature is so hard.  Notice the little hand axe there :)?


It was air brushed with dark green and nato black.  The idea is that the off road area will have some grass or plants around so the rocks would have a bit of moss on them.  The tar road looks okay, although I'd make it more grey down the track.

I then applied pigments on the off road area, loving how it turns out: it looks convincing enough.

Because I had only painted the metal parts and without another other color the painted parts are not so obvious.  I guess I made it a bit too 'worn-out' or 'dirty'.  Perhaps I should take a better photo of it...  Anyway looking at it in real it looks convincing.


[[[ SHE IS DONE: http://51-cent.blogspot.hk/2013/10/Sophie-done.html ]]]

Monday, September 23, 2013

Preping metal miniature for painting, Reaper KS Urban Legend Sophie WIP

So all the hard work that went into filling the gaps at the fork-tube and the wheel turn out okay. Although the sculpt work near the wheel isn't as detailed as it could have been, I guess this is done on purpose so that the connection is stronger.


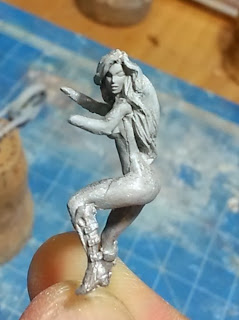
Next up is to check on the mold lines and smoothness of Sophie herself.  And yea to my disappointment the big line running down her side is very deep and it's actually caused by a slight mis-cast, which means the two halves of the mini didn't line up perfectly well so there's a 'cliff' there.  Not easy.  Also her left eye is a bit too far away from her nose, and I can't tell if it's actually a closed eye or open... I'd guess I'd worry about that later...


This is the best I can manage, I think I can get away with it by using thicker paint to smooth out the line...

After a lot of scary bending I kind of connected the handle to her arms.  It was scary because the handle is very thin and her arms are very stiff.  Bending at the wrong part could ruin the sculpt.  It was nerve wracking... especially when this is not my mini...

As shown the handle isn't perfectly symmetrical, but I guess that will have to do...

Then it's off to the next stage of base coating.  I got them all mounted and ready for final priming and base coating...

[[[ SHE IS DONE: http://51-cent.blogspot.hk/2013/10/Sophie-done.html ]]]

Wednesday, September 18, 2013

Additional theme for the blog - Photography

Hi Everyone.

Yes hit rates keep me going with this website so I am doing a lot to help push up the figure.

A somewhat related topic is photography, something that I almost equally love and spent a lot of resources on.  This is my usual equipment: Cannon 40D with a 100mm Macro lens.

The lens is versatile and can be used in a wide range of situation.  Here's a shot of a cute pug at my friend's place.

And here's a shot of a wooden carving, outdoor at about 10 in the morning.

Here's a shot of a cat checking me out, shot at outdoor at sun set.  Because it's a 100mm I can take this picture from a distance and can still get a lot of details of it.


And these are shots that I most often take, 3cm tall miniatures.  This one was taken at normal room lighting without tripod.  Going forward I'd get more data such as focus and exposure value.  Being a macro lens it really manage to bring out all the details there.

The following two shots were test shots when I first got the camera.  It wasn't easy getting used to it, for one thing the image can get fuzzy very easily.  By now I had already got a simple tripod to keep it stable.


Monday, September 16, 2013

Basing - bricks tiles laying

I had always been living in Hong Kong and got used to seeing bricks road and bricks walls because of our British colonial times.  So for building miniature bases I had always wanted to use mini bricks.  These mini bricks come from PK Pro: they are real ceramics and brick and chip like real bricks.  However I would prefer them to be a bit thicker, but I guess I can always lay them flat on a horizontal surface.

So the first step is to lay down the 'cement' on the base.  I used miniput because I thought it would behave more like real cement.  To its credit it really did, but not as 'sticky'.  At the end some of the bricks fall out and I had to glue them back.

It's not easy to make it flat like this, took me forever with the sculpting knife to make them reasonably flat.  Keeping it wet though coz the wetness could keep them sticky.

Then on it's all about hard work of laying them down one by one.  I should have measured and set some kind of guidelines so that they line up better.  Since this is my first I didn't try any other alternative patterns. Chipping them into smaller bits can be tricky. I ended up using model flat clipper to snap them.  The loose bits got used to fill in the little gaps between the tiles.  Pressing them down on the white stuff is kind fun.  I could have space them out better so that it look more real.  Notice I chipped some of the bricks so that it appear more convincing.

 And it's done.  It look convincing but it does look a bit boring,I could have thrown a broken tile or cracked ones in to make it appear more realistic.  But this is my first so I guess it turns out ok.  Thanks for reading.

Here is an alternative designed I made, haven't decided on which mini could use this though...


Tuesday, September 10, 2013

Reaper KS Urban Legend Sophie WIP - fork tube

I know nothing about bike but thanks to the Internet I know that part that connect to the front wheel is called the Fork Tube (http://en.wikipedia.org/wiki/Motorcycle_fork), and that's the bits that I spent a lot of time on.


so the first and most delicate part is to drill some tiny holes into the part that they needs to line up.  I haven't done any markings on it so i just guessed whereabout is the middle and drilled.  It is very hard for me to drill straight too.  this is tiny so I can't use the power drill as it would easily slip.

so after a lit of drilling and pinning I joined them together.  It wasn't easy, they didn't line up properly and there's still a big gap in between. So it's green stuff stuffing time.  It is actually harder than it looks, it isn't easy to handle such tiny bits of sticky green stuff, and even harder to smooth it out.

But after so handling it for so long it got easier.  In hindsight I could have mixed in some grey stuff so it gets even harder and can allow some sanding.  But then again I can always just smooth it out by cutting.

so while I got some green stuff I did some smoothing out on the body.  The body is formed by two parts and they actually didn't line up properly, so there are 'cliffs' at some parts of the body.  For some parts I can get away with cutting out the 'cliff' but for obvious area like the body and the part under it it has to be done with green stuff.  I haven't prime it yet so we'd see how it goes


All thanks to the having the right tool really.  This is the stainless carving and shaping knife I got, best investment in tools ever.

[[[ SHE IS DONE: http://51-cent.blogspot.hk/2013/10/Sophie-done.html ]]]

Monday, September 2, 2013

S09 Might Makes Right - Zombicide game play report

This mission had always been hard for me.  I tried a couple of times and failed.  What made this scenario difficult, to name but a few:
  • It's a small 2x2 tiles map, there's not much space for maneuvering
  • if someone dies, the mission is a fail
  • there are four objectives, three of them give you one more survivor, one of them is a blank and doesn't give you a survivor
  • newly added survivor doesn't carry anything in hand, and starts at zero experience point
  • you start with 3 survivors and it's a small map, kill count climbs up really fast 
So after a couple of try with one survivors and failing very fast, I tried again with three.  I picked Wanda for her speed and Josh to slip around to get the objectives.  I also picked my newly painted Claudia so the melee support as I thought the zombies would get close really fast.

A group shot before anyone got hurt
We rushed to the police car to search for weapons.  We got the 'arrgh' card and zombies popped up, it wasn't easy and the weapons drawn were not that good either.

Our luck improved as we rescued Dakota in the first house.  Much thanks to Josh's slippery skill.  The survivor rescued is random, I throw two dices and just count in the tray to see who got picked.  As it turns out she was very helpful.
In the bathroom stood Dakota,  she slipped into her evening wear and signaled her readiness
Moving to the second house took a lot longer than I thought, the path was packed with zombies and they advance from both sides too.  I got lucky that I didn't get the Abomination card and only one or two runner pops up
Getting crowded

Seems like there is a discussion between the dead
Yes in this world, there are kid zombies too
The second objective is again not the blank and Ivy turns up.  She proves to be a good supporting ranged attack with her sniper skill.  Too bad I can't give her the rifle and she missed a lot of shots during the game.

I was lucky again with the second last objective marker, Kim turns up or else she would have to escape from the north east house, which is the spot furthest away from the exit point.  At zero experience and no weapon that would be very difficult.
Greeting Claudia in the small room is Kim
But for Josh getting in there and getting out is just a walk in the park for him.  After he got the objective market in the North West house (Ivy) he just slipped pass the crowd in the main street, got into the house and arrived in the room with the marker.  His escape was equally easy.
Josh just slipped past the crowd and walked right to the objective
Near the end Dakota did a lot of killing by pulling in the crowded with her Taunt skill and 6 dices killing with her pair of sub-machine guns. 

And so we won, for the first time since I got the game I passed this mission.  

MVP of this mission:  Dakota
That was a recent second attempt at the same mission.  I had an earlier attempt but failed because I got the mission objective wrong.  but if you are interested, here's a serious of short clips of how the game went.  Enjoy.

Sunday, September 1, 2013

10,000 hits! & limited edition Reaper Kickstarter Urban Legend Sophie (unboxing)

**YEAH!! 10,000 hits and counting!!**


Actually most of the hits are by bots and search engines, but a hit is a hit and I am happy that I made 10,000.  If only I can make a dollar out of every hit aye? Don't worry, AdSense will cover that.

by the way, I'd be on a two weeks trip very soon so won't be updating this for a while.


Just a bit of something related to painting, here's my very detailed review on the limited edition Reaper Sohpie that's only available to Reaper BONES KickStarter supporters.  didn't make a big deal out of it as my left hand too up most of the screen...


Since the video ain't that good in showing the details, here are some close up shots.

How she looks like with all pieces together

the wings gave her a lot more presence, which also means she needs a bigger base

some gap filling work with green stuff, may be so small plastic pieces too

It's a very clever touch, a dented area for the right leg to fit in, pinning required coz her leg will become support of the bike.

the hardest part of modeling, how to fit her hands to the steering handle
they are really far away...

mold lines on her legs

Related Posts Plugin for WordPress, Blogger...