Showing posts with label diorama. Show all posts

Tuesday, September 15, 2015

"The Escape" - diorama setup

Hi everyone, I am back and hopefully I can keep posting here.  This is going to be a slow project as I am working on a pretty complicated, long-overdue paint job (checkout my FB page if interested: https://www.facebook.com/ipaintiam).
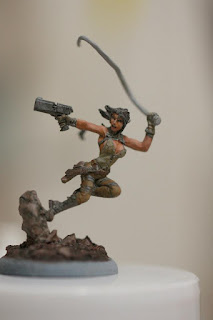


I love this Sophie, so much so that actually I got two of her, one that I had already finished a while back, and another one sitting in the box since last X'mas.  Here is the one that I had already painted, excuse the poor lighting...  She had been one of the better models sitting on my display shelf for long now, but one thing that keeps on bugging me is that she deserve more, more elements to complete the story, and especially something for her to shoot at...

So when I ordered another Sophie during last Xmas, I order a bunch of other mini to compliment her.  Sticking to the tomb theme I got an army pack of mummies and a mummy lord... Excuse me for not correctly naming though cause I am not really into pathfinder.


The fun thing about doing diorama is that I can play around with the setting ideas in my head for days and days, and gave me excuses for looking up all sorts of stuff like background information on tombs.  One one that I really want to get happening this time is to set a good composition for the whole thing, trying to use techniques like triangle placement, 3:1 golden ratio extra... the current idea is like this one.


Wednesday, December 10, 2014

Stone Slabs Street Showdown - building the base

It was a learning experience.
(This turns out to be a very long entry and got a lot of photos... )

I made a lot of mistakes, acted on impulse and bought a lot of material out of impulse as well.  So as it turns out I don't need a lot of the stuff I bought and I wasted a lot of material along the way as well.


I did a mock up by just putting together some stock paper and wood.

Then I just stuff the spaces with a lot of clay, really, a lot of clay. but as I realized that it was a waste I started to use more wood to set up the base first, to fill up the spaces so that I don't need so much clay.


got to love Juweela bricks.  I had been using them on a lot of my models.  This time around I learned something more about them: don't prime them, just paint on them.  I made such a mistake and it took me a lot more work to get it look real.  Also, it pays to put some space between them.  In reality they won't be so neatly packed together like that.


This is how it looks like after I filled in the tiny gaps between the bricks, primed, washed and added a lot of pigments.

Canon EOS 40D
Canon EF 100mm f/2.8L Macro IS USM
1/6s f/5.6 ISO:800

So when I had learned my lessons I used a lot more wood to make some framework under bigger wood panels so that I don't have to fill the spaces with expensive clay again.


And when It's done I just put a thick layer of clay on top, and start sculpting the surface to make them look like stone slabs.  I smooth out the surface by dripping a lot of water on top of it and smooth it with finger. It was quite messy actually. I sprinkled some sand on it so that it got more stone like texture.


This is how it looks like after priming an air-brushed.  Back when I was trying to smooth it out I used a lot of water, so at the end there were a lot of 'spikes' as the clay behaved like whip cream.  I ended up having to clip away the spikes to make it look more natural.

Canon EOS 40D
Canon EF 100mm f/2.8L Macro IS USM
1/6s f/5.6 ISO:800

I know it isn't a good thing to re-cast, but this is only for me and I am not selling it so I hope secret weapon won't mind.  I got a huge 50mm base from Secret Weapon's sack of crap, and re-casted a sewer cover (man-hole) with green stuff. It then was put near the path that cuts through the stairway.  I am hoping that it would create a sense that there is something more out there outside the boundary of the base.


This is how the path looks like.  I traced lines on the path so that it looks more like concrete road in Hong Kong.

Canon EOS 40D
Canon EF 100mm f/2.8L Macro IS USM
1/6s f/5.6 ISO:800


Monday, December 8, 2014

Stone Slabs Street Showdown - my first full size scratch built diorama, inspirations

Hi everyone, I am back :)

I had been posting these on WAMP forum but I didn't get a lot of interest,  but I'd still post it here to see if I can get some more interest here.  So at this moment the diorama is already half done and on to painting the characters already.

I always wanted to do a full scale diorama, but never really have the courage to do it.  This time around I got a lot of motivation from the Umbrella Revolution movement I got inspired and put this idea into action.

Well this is only my first stab at building something this big I made quite a lot of mistakes, one of the biggest mistake is that I haven't thought the whole thing through before going on to make it.  I did made some sketch of course but that didn't help much.

Anyway, on the the topic first.

It all started when I came to the understanding that any mini diorama basing should not only have a good base, enough stuff to support the miniature, but a good diorama base should have stuff UNDER the miniature, BEHIND the miniature and even ABOVE the miniature: ie, levels.

So I figured that there's a street here in Hong Kong that is famous for it's stone slabs that should be perfect for a good base... slowly the basing idea became a diorama idea...

To date it's still an early stage project but it's slowly coming together...

The official name of the street is Pottinger Street. It is a street in Central, Hong Kong, which better better known as the Stone Slabs Street (石板街) by the locals, named after the granite stone steps which are a rarity nowadays in Hong Kong. The street was named after Henry Pottinger, the first Governor of Hong Kong.


There is actually a Air Raid shelter under this street, but was later covered up with stone slabs. Originally I thought it would be really cool to built this into the set, but this idea haven't made it to the diorama though...

a bit more about the history of the street here
(source: http://gwulo.com/Pottinger-Street-Hong-Kong)


When it was last checked in the 1980's, it was considered to be at risk of collapsing, and so was filled in.  This tunnel, along with Hong Kong's other Air Raid Precaution Tunnels, was built around 1940-41, so it would have been finished some where very close to the street's 100th birthday. 
The single, sloping entrance to the tunnel was on the section of Pottinger St about midway between Stanley and Wellington Streets. From there the tunnel ran for appx 75m, straight back into the hill. Its only other claim to fame seems to be its ventilation system. It was one of two ARP tunnel networks in Hong Kong (the other was the the tunnel under the governor's residence) that used ducted ventilation. That would have been a necessity for this tunnel, as with only one entrance and no ventilation shaft, there was no other way to circulate fresh air.


and a little bit of blog admin.  Thanks to my entry on photography I got over 1,000 hits a day and a few more clicks on the ads.  and now that the blog traffic is a lot more healthy it gives me a lot more incentive to blog.

Tuesday, November 19, 2013

"The Rescue" - Reaper LE Sci-fi Sophie diorama

Hi everyone,  after working on this for a month I had completed it up to a stage where my current skill level couldn't improve it any further, plus I wanted to bite through the rest of my pile of miniature and I want to start working on another commission job, here're my Sci-fi Sophie completion shots.

The most important element of this diorama is of course Sophie.  But with the sculpt you can see that she is looking down, that was why I need to spend so much time working on the rest of the set up: to give her something to look at.


This is an overview shot of the set up.  I could have done a lot more air- brushing with the structure, giving it more dramatic lighting effect, but because this is my first serious larger diorama I was again rushing towards the end a little bit, so I haven't.  Likewise the weathering could have been done a lot better.  I would take a better shot of her later, the wing is just slotted onto the column by two brass pin so I still have a chance to change her pose if I wanted to.


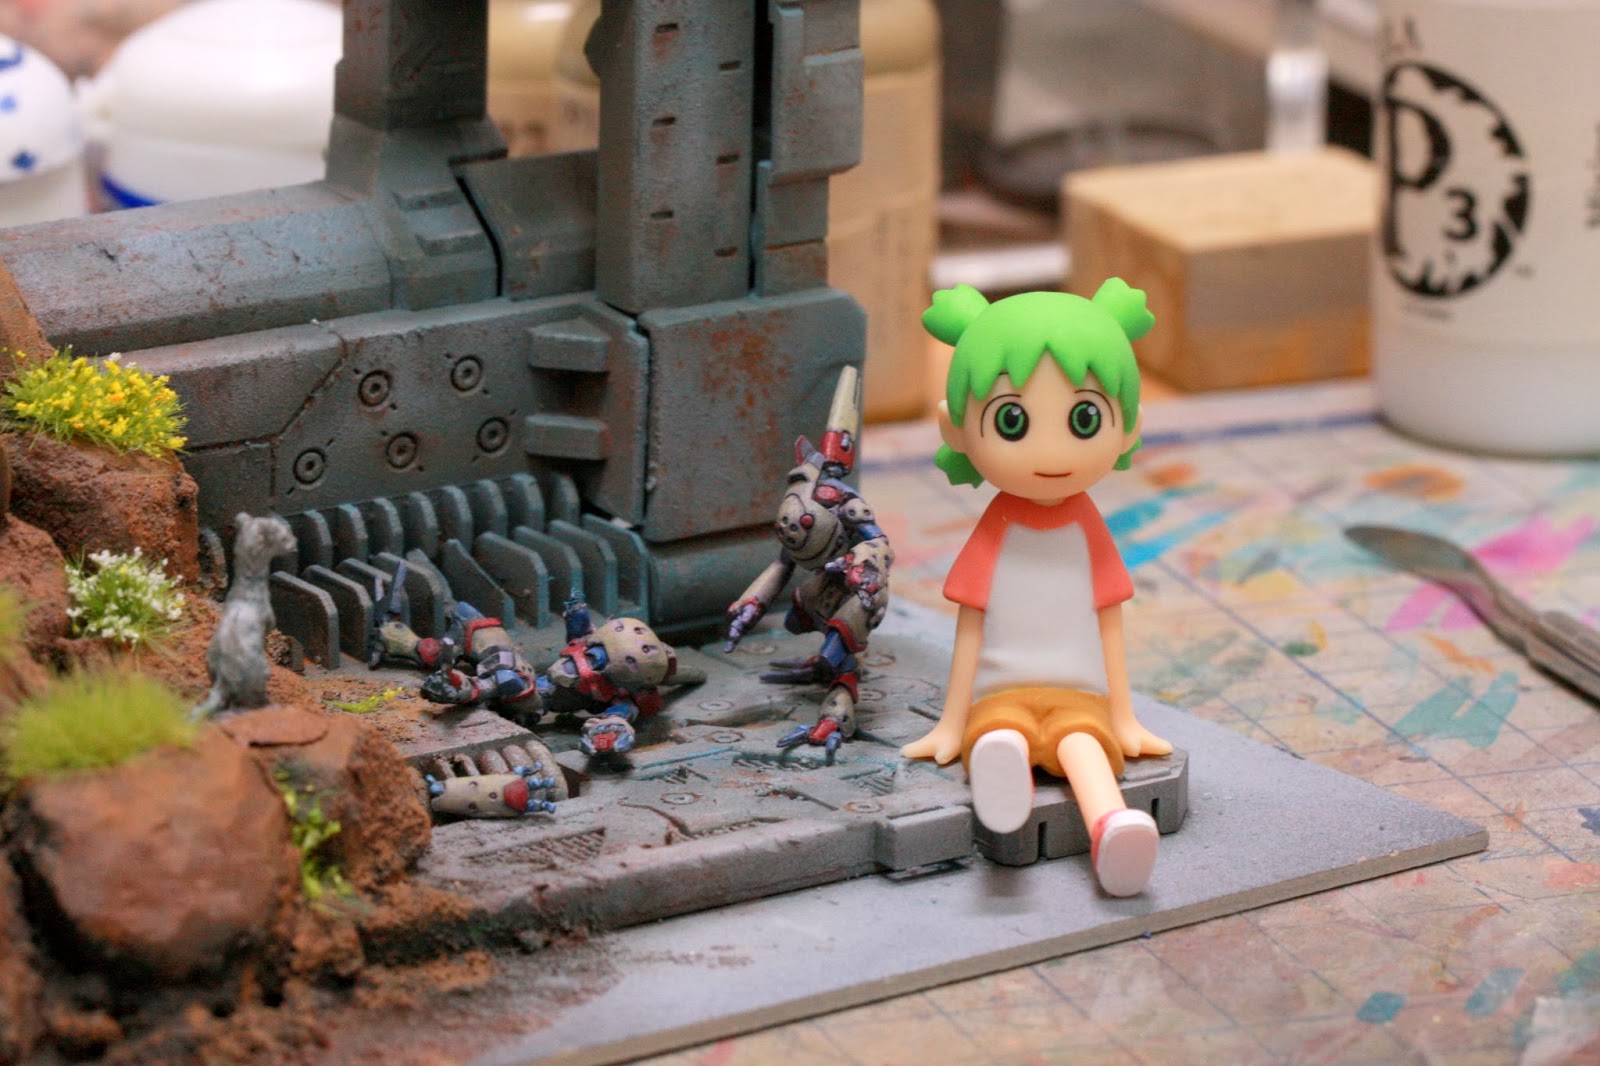
The scene below took me a lot of work.  Painting infinity miniature is always enjoyable as they offer appropriate details and very sharp outlines and recesses.  Had some fun making the severed arm and adding the loose wires in, will take more close up shots later.


Back story:
"The base was abandoned due to the land slide.  A ferret made a home among the cracks of the boulders. Sophie led two drones to check up on the base to see if it is possible to clear the boulders out.  The first drone landed on the yellow flowers and slipped, broke the hip joint and its arm upon impact on the ledges. The ferret, which was alerted by the commotion, came out and saw the severed arm.  With its natural habit of picking up loose items it took the arm by the loose wires and drag it to its lair.  Just then the second drone landed next to the fallen drone.  The drone didn't notice the ferret at first.  When it finally did, it got into battle stance, just then Sophie arrived, descending upon the scene, amused."


Here's a close up on the 'air-borne' Sophie.  The most fun I had with her is perhaps when I paint her suit.  It was only air-brushed with shadow and highlight, plus a thin blue base paint.  Because I got the contrast right this time I don't really have to paint on the blue highlights.  Same thing goes with the armor plates, which is in the same colors as the remotes.


Thank you for reading :)

Go back on the WIP adventure featuring Yotsuba-san!:
http://51-cent.blogspot.hk/search/label/sci-fi%20sophie


Forum links
This entry is replicated on the following popular miniature related forum:
WAMP Forumhttp://www.wampforum.com/VB4/showthread.php?t=16347
Reaper message boardhttp://www.reapermini.com/forum/index.php?/topic/52491-the-rescue-reaper-limited-edition-sci-fi-sophie-diorama/
CMON Forumhttp://www.coolminiornot.com/forums/showthread.php?55296-quot-The-Rescue-quot-Reaper-LE-Sci-fi-Sophie-diorama


In case you don't know who Sophie is, she is the mascot of the Reaper Miniatures.  Reaper is one of the biggest manufacturer of 30mm miniatures, mainly fantasy themed and they also have a comprehensive ranges for modern days and sci-fi adventure setting.  The following is something about this very special miniature (quoted from Miniature Giants)

Reaper Con 'SciFi' Sophie 2007 (Limited Edition, Discontinued), 

Reaper Con figures, like this one, were only available during the week of ReaperCon, in this case May 17-20, 2007, and were not made available to distributors. Furthermore, after the week of the show, the mold is retired and no additional figures are cast. This 25mm scale figure was featured on the cover of Reaper's Casketworks catalog #22 and displays a clever combination of SciFi and classic fantasy.


Friday, November 15, 2013

Dark Sword Elven Princess mini diorama

This set was done a while back, it was the first finished piece since I got the air brush, but before I learned more about using it.  So here I haven't done much air-brushing except for  putting in shadows around the edges and behind the pillars.  I guess the mini would loo a lot more dramatic if I do a better job with the dress.


Darksword miniatures are very good at getting the proportion of the human body right, except they all got very thick legs.  When it comes to legs I guess other brands do it a lot better, like McVey or Meow.  The best part when paint her is her bosoms, they look real and very easy to paint.   I haven't spent enough time on the mini dragon and the book stand though.


If I were to name this piece I'd call it 'Distraction'.  The fun part of making diorama is trying to figure out how all the pieces fit together and how the rest of the scene complement it.  I had a lot of fun making this.


Wednesday, November 13, 2013

Dark Sword Elven Princess mini diorama - wip

I built this diorama to use up some of the 'basing material' I collected over the years, it's also a gift to my friend.  the base was an ordinary 50mm plastic, then stacked on with a few  beer coaster, followed by broken tiny ceramic tiles.  It took me a long time placing them in, fun though.  The bigger gaps were filled with green stuff.


The pillars were made with straws and white/green stuff mix.  I first push through some cream in the inside of the straw, then push in the mix.  After a few hours I cut open the straw and take out the dried rods.  Because it is mixed with white stuff it chips, and so I cut it up into smaller sections and stick them back together to create the cracks.  Then I thought I might as well just sculpt the details of the pillars by chipping with hobby knife.


Painting her was actually quite fun, especially when she got so much skin showing and painting skin has been something that I am good at.  Although I did still make the mistake of not doing the highlight right, it turns out okay.  Thankfully the eyes are bigger than normal.


[Pictures of the completed diorama: http://51-cent.blogspot.com/2013/11/DSElven-2.html]


For those who are interested in having a go at this magnificent miniature, here's the link

http://www.darkswordminiatures.com/shop/index.php/female-elven-princess.htmlSKU: DSM1167Sculptor: Jeff Grace
Materials: Pewter
US$7.99

Thursday, November 7, 2013

severed arm put in place - Reaper LE Sci-fi Sophie diorama WIP

took me a lot of fiddling to get the arm in the right place. I made the mistake of not planning for this at the start and I cut off the pin that used to hold it when I was painting it, damn.  Anyhow the brass pin is actually still visible when looked from the side, but I guess I'd cover it up with a small grind of sand.  The area around the Ferret need some attend as well.  But overall, I think it looks very convincing.


Wednesday, November 6, 2013

Ferret painted - Reaper LE Sci-fi Sophie diorama WIP

It isn't much of a progress but to keep this blog alive, here's a less entertaining update of the diorama.  Here on, I can finally start on the star of the diorama, Sohpie.


Monday, November 4, 2013

Painting Nasmat remotes - Reaper LE Sci-fi Sophie diorama WIP

Hi everyone I am back! Such a short break is it?  Well this time around it's finally brush to miniature (instead of pen to paper) with my diorama!  We can finally moved on from the base to the miniatures!


The ferret hasn't been painted yet but the remotes are pretty much done! We'd need to put on the final highlights depending on the over all looks of the set up, but for now they are pretty much ready.  Took a lot shorter than I thought.


So, this is how we started, we spray painted the primer on and used dark and light paint air brushing to get the shadows and lighting right.  Although they actually look better with just the dark and light air-brushing, I believe some day I would be just as good with the lighting effect... I'd just have to understand color and paint mixing better...


Learning from my mistake, this time the 'light' paint isn't purely white but actually it's a light purple.  That is because painting whitish color is hard for me as I tend to over paint it.  So with this air-brushed light pink it could bring out the whitish highlight color easier.


I am following a color scheme that I found on line, instead of using the box art.  I am planning to use the same blue-red-khaki color scheme on Sophie... when I finally get to paint her this week..


I had applied a very focused and careful wash to the recesses of the ferret, and all its features got a lot more apparent.  Again, well done Reaper for such a fine tiny metal miniature.  (yes, metal, not BONES ;) )


The fun part, I guess, is to place them on to the base. I learned the hard way that all these elements are suppose to be pinned, not just glued, to the base.  So what I did is I drilled a bigger hole, put green stuff in the hole, and press the pin to the green stuff, with a bit of glue to its feet.


And of course, the whole point of the base is to let the Remote lock gaze with the Ferret.  so I had to check several times that their gaze met.


Notice how I haven't took a close up shot of them? that is because I haven't really completed painting them so I am saving the close up shots for later :)

bye for now :)


Tuesday, October 29, 2013

Floaking, Reaper LE Sci-fi Sophie diorama base

Hi everyone. It seems that Yotsubato is bringing in a lot of traffic to my blog, so here's she again. Say hi Yotsubato.


I think all the modeling of the base is very much done, so it's time to put some finishing touches to it.  To make the rocks look natural, it's time for flocking.  I noticed in real life that grass grows better from bigger gaps or cracks between the rocks.  When unattended, smaller plants instead of grasses will grow too.  To recreate that I put white glue between the cracks and then sprinkle these fabrics down there.


Next I used these ready-for-use small stubs of flowers and tall grass on the flatter area of the rocks.  I imagine that before the land slide they would have been growing grass, so I would imagine the grass will keep on growing.

Here are some close up shots of the grass and the flowers, beautiful isn't it.


As good as these grasses are, I still have to trim them so that they look less like they are just bursting out of flat ground in a fan shape.


Later on I'd post some better shots of the set up, and there's Yotsubato, complaining that there are still no miniature on the base after about 10 entries....

"Where are the miniatures??"

Related Posts Plugin for WordPress, Blogger...