Showing posts with label air brushing. Show all posts

Wednesday, December 11, 2013

Base-coating, Tales of War Kenjiro WIP

Finally got my mood around to continue painting the guy. Done the eyes with GW Black wash as it was so tiny. Need to put in a little bit of white for a sharper gaze though, else the close up will look bad. The muscle tone now actually looks very flat as I had only done it with one color now, good that the air-brush base paint helped with bringing out the contrast.


The best feature is perhaps his ... pants? very nice effect done by air brush. Butter pictures later.


Tuesday, November 12, 2013

air-brushing - Reaper LE Sci-fi Sophie diorama WIP

Again not much of an update, just trying to get back to the swing of painting as I had stopped for a few days.  That's actually my pattern, finished up to a stage and then just not in the mood or finding excuses not to paint for a few days. I understand that and I had work around that by leaving the most interesting part to the last to keep myself interested.


Anyway, here are some shots of Sophie herself.  I had choose to stick with Reaper's original design and keep her original wings on.  Although I think a sci fi style wing would have been much better, but I guess this will work just fine.  It's air-brushing all the way here. I used dark blue and deep red for the shadow, giving it a very deep purple.  The highlight on the wing is flesh tone with a bit of red, I hope to give the wing a more yellowish hue instead of leaving it too brown.  The body itself has the same first coat of highlight, then another layer of closer to white highlight.


Friday, October 18, 2013

Reaper KS Urban Legend Sophie - Done - (NSFW)

Well, I did my best but seems there still a lot could be done.  The worse part is that I was away for two weeks and left her out cold for so long, so I had left out some important steps and got some sequence wrong. But I guess this is really already my latest best, using almost all of the equipment and techniques I learned through out the years.  All in all, I'd give myself a B+


So I guess I better post some 'money shots' up front, here are photos of her chest.  Personally I would prefer the version with armor but this one works too. This is the first time for me to paint a nude mini, and so this is the first time I painted nipples.  Having seen a lot of these (I am a guy, okay?) I think I did a pretty good job.


Well this is a personal blog so I'd be honest with the photos.  I had decided to paint her eyes closed because the sculpt was cast this way, I tried painted it was an opened eye and it looks very odd.  The other eye is VERY hard to paint because of the hair.  So if you look closer, it doesn't turn out well.
And as far as honesty goes, I haven't done a good job with the hair too.  I guess I should have air brushed the hair, and give her body a flesh tone base coat as well...


Again, being a guy and having seen a lot of the back side, I think I did pretty good.  Although I haven't sand the surface a lot it's still reasonably smooth.


The wings looks fine, I believe.  This is the first pair of wings I painted because usually I just forget about the wing and fill the hole on the back.  Since this mini isn't mine so I have to keep it on.  As it turns out, the wings really did give her a lot of character.


First time ever painting of a motor bike, I guess I can make it a lot more 'shinny'.  I like how the wings turns out though.


I guess with basing it's all the little details that matters.  I placed an hand axe on the ground so that there's a reason for her to look down and to the left.  There's actually some skid mark on the ground but I haven't done a good job with that.  The flocks are actually ready made so that look so real, but I think I did pretty well with the ground as well. 


Wednesday, October 16, 2013

Making boulders with paper clay 2/2 - Reaper Sci-fi Sophie diorama WIP

So before I put Sophie there I think Yotsubato would be the main attraction these entries.

"Hi everyone!"
So here it is, I put a big piece of cardboard as background so that my paint rack won't confuse everyone.


To add more texture to the rocks I used a carving knife to chip away the smoother and rounder surfaces of the balls of clays, so it looks less like rabbit poo ;).  The 'mud' dried out very nicely, I guess by accident I found a way to more evenly and randomly apply sand to an area.


I first air brushed the recess and gaps and holes and cracks between the balls of clay with dark blue.  I did the same for the edge so that it looks more like an edge and it helps with directing focus to the middle of the setting.  I haven't done a great job with the mix for the highlights but as it turns out, the mix was just right for the structure.


The mixture was a white + light blue + brown.  I air brushed the whole structure trying to show the different layers of the base and giving it more dramatic lighting.  I guess I might need to do more air brushing with the structure, but I guess I'd do some weathering first.  Also I need to do quite a bit of base coating to cover up places where it used to stick to the plastic frame.


[[[ for closer to finish looks of the boulders, please visit: http://51-cent.blogspot.hk/search/label/sci-fi%20sophie  ]]]


Here's a shot of the back of the structure.  Next up, the ferret.


Wednesday, October 2, 2013

Reaper KS Urban Legend Sophie WIP - putting the parts together (NSFW)

Well, due to the Reaper forum rule I can't post any of the nude photo of Sohpie, even if all the 'good bits' are not showing, I'd have to post them here at my blog.

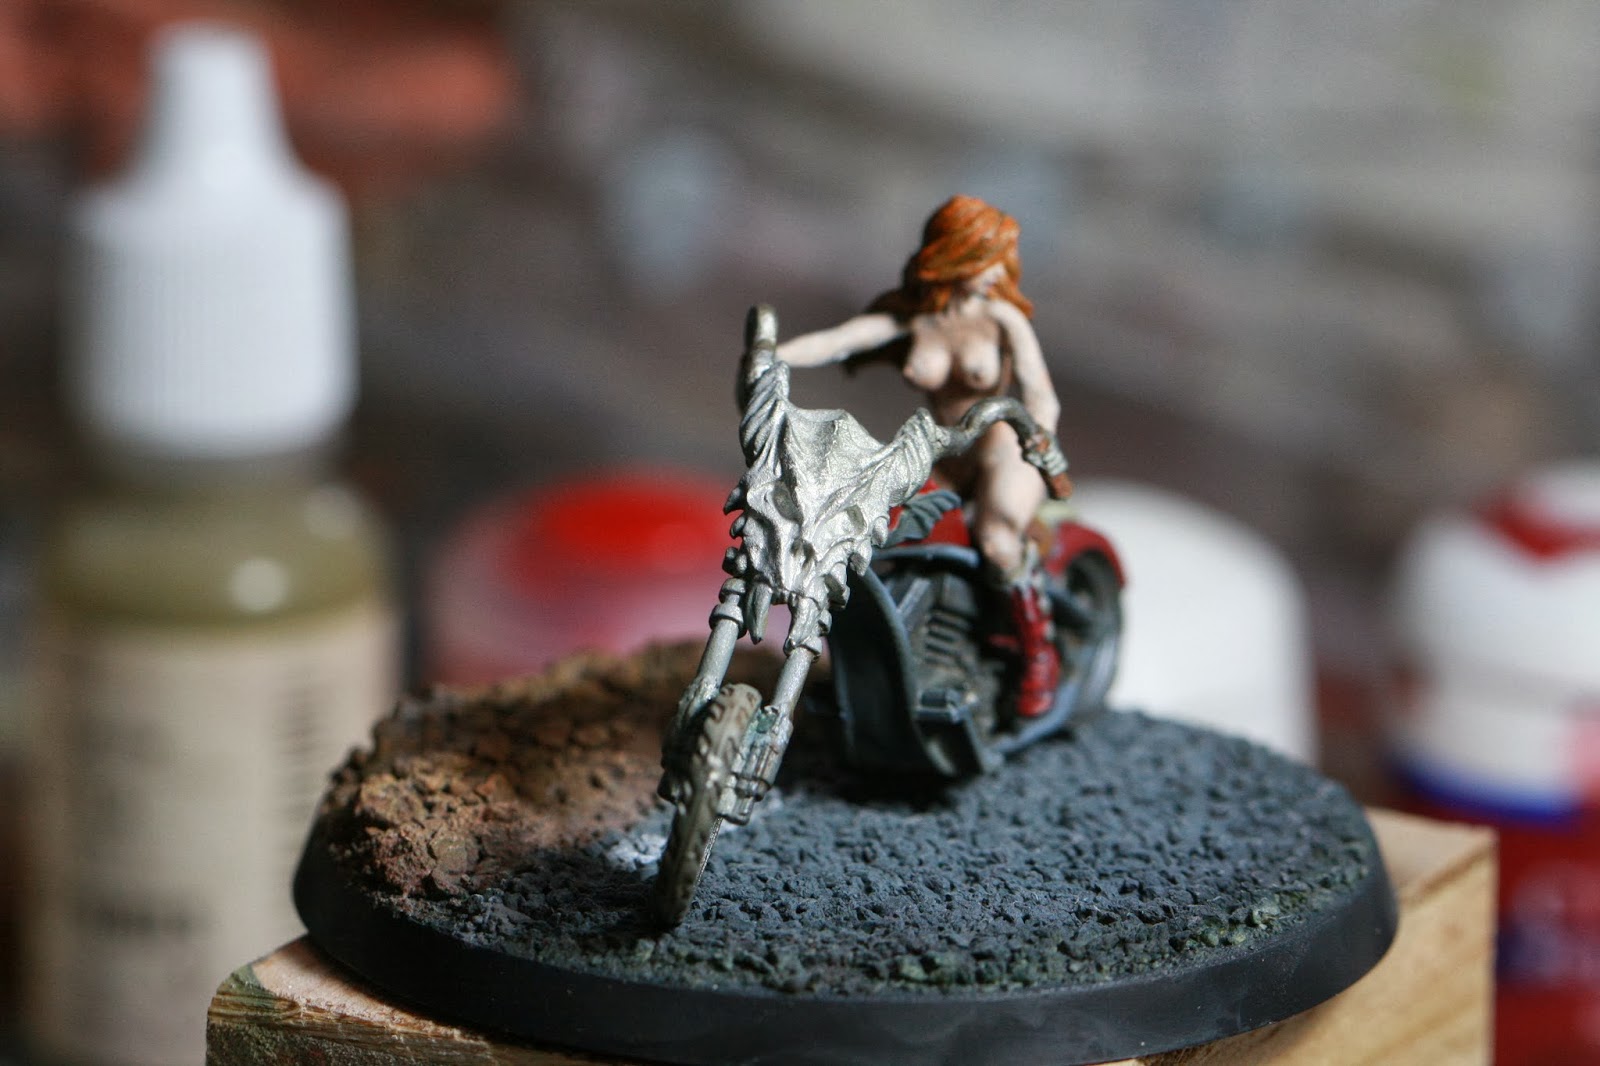
One lesson I learned and took to heart is that always try putting the parts and the mini to the base before painting, remember how they should fit together before painting them.  The most important thing about Sophie here is that her bottom doesn't touch the seat, and the belly of the bike doesn't touch the base.  Therefore the bike is lifted by the front wheel of the bike and her right leg.

Got to give the sculptor credit for paying attention to the tensed muscle (should be the Biceps Femoris) of the right leg, that is a very nice touch.

The forearm isn't as well done as the legs though. The forearm is much smaller than the gloves to start with, but granted if I am brave enough I could have used green stuff to fill in the gap there.

Here are a few more shots of her before I put the wings on.
[[Here's the entry on the wings]]
[[and here's the entry on the base]]


I got to admit that I was wrong  about the wings at first.  At first I never really liked putting the wings on, but now that I had seen this, I think having the wings balanced front and back of the figure, and added a lot of character to her.


I tried doing some skid marks on the base but it seems pretty hard to get it right, given the base being so dark, so I gave up.

Monday, September 30, 2013

Painting giant wings, Reaper KS Urban Legend Sophie WIP (NSFW)

This is the first time I painted a pair of wings, not this big at least.  But I figured that it should look something like leather, and should be a bit dry having been driving across the desert.  So I again air brushed the shadows and highlights with dark grey and white, and then thin painted on deep brown and light-grey-brown on them.

The highlight was done with white pigments mixed with thin light grey-brown paint, the recesses were painted with nato black mixed brown.  One thing I learned is that the Nato Black really would eat away some of the paint if it is painted on the edge of the painted area.  more about this later.

These are the photos of  the wings being mostly done.

Then on I had to do the claws at the tips of the wings.  At this close up shots the pigments are really showing up.  After these shows I thin painted some more mid tone to smooth out the transitions.

Although the claws were hastily done I like how they turned out, it was just GW Bone paint with GW brown wash at the edges.

So finally... I put the wings on her back.  See that little shiny bits on the right? that was the bit that was stuck to the holder and it wasn't painted on.  I put on the dark brown mix but forgot that it has some Nato black mixed in, so when I did that, it eats away the edge of the painted area.  I got that fixed later on.

I'd say the base is a good choice, now that I can see her with all pieces attached.

Thursday, September 26, 2013

Painting nude human figure, Reaper KS Urban Legend Sophie WIP (NSFW)

Yes I could have just air brush the whole body with skin tone, I forgot.

One of the reasons why I turned down that idea is because I don't have the right color for it, I got a very pale flesh paint as the highlight but I don't have the right color to do the shading,  that was way I stick to using dark grey and white to do this.  My other worry is that if I did use the flesh paint I can't match it with my brush on paint.  Then again, no one would have notice the difference.

Here's a very honest shot of her, the hair isn't that nicely done but it was meant only as a base coat.
The one 'artistic decision' I made is with her eye.  Her left eye really isn't that nicely done, if I were to paint it as an opened eye it would look very, very odd.  That was why I decided to paint it as closed.  I could have gave her some eye shadow according to her concept art, she doesn't wear make-up.

Yes, the nipples.  Painted for four years and it's the first time I painted nipples.  Being a guy girl's nipples are naturally my prime concern: the color has to be right.  They have to be cute, they have to arose men, they have to look like little cherry sitting on top of a milky pudding... O_o... hope no one actually read this bit but I love writing it though, haha.
Pretty proud of the shading and the highlight of the rest of the boobs, I had done a lot of boobs by now and I got the hang of it.

Same thing with her bottom. Actually I did painted her private area as well but I don't think anyone would see it.  And in fact, it's just a line down the middle painted with wash, and a few more lines down the side and thinner wash to give it a bit of color.


Wednesday, September 25, 2013

Painting red, Reaper KS Urban Legend Sophie WIP

I love painting red, I guess that had something to do with being Chinese.  To us red means good fortune, we use a lot of red in celebratory events such as wedding and new years.  I guess painting has a lot to do with what we see in our daily life and that affect what we try to re-create by painting.

Tonight it's all about painting red on.  I had to paint the 'bone' on the back fenders first so that I can get to the gaps between the bones and the fenders better.  One thing that I learned while painting is that sometimes it's better to do the little bits first before painting the larger area that the bit is based on.


As shown the air-brushing really pays off now, I am using very thin paint and the light/dark base coat can help with setting the lightness/darkness of the paint I put on. The bone part was done with GW Bleached Bone as the base coat, followed by Repear's Khaki Shadow (09121) and GW Black Wash, and highlighted with very thin Repear's Khaki Highlight (09123).


Very happy with how the air-brushed base shown through with my very thin paint.  So the next part is to push the highlight even close to white, I'd very likely be using my air-brush again, but we'd see. Had a bit of thought about the wings there when painting the gas tank, I guess gold is the default color as it would look good on  red, but I am thinking bone color or brown might work too... but I guess the wing has to kind of match the style of her boots, which got wing like ornaments  on them.


The boots aren't as well done as I would have expected.  The contrast on the boot isn't too good to start with and I made a mess when applying blue wash to the shades (I put too much).  So I guess in the next round I'd need to put on more red to the shading area.


[[[ SHE IS DONE: http://51-cent.blogspot.hk/2013/10/Sophie-done.html ]]]
Related Posts Plugin for WordPress, Blogger...